As its competitor Autopano Giga, PTGui enables experienced users to edit the pre-stitched panorama to have an ideal and optimized final rendering.
PTGui's "Panorama Editor" enables to make numerous aesthetic, technical or linked to checkpoints modifications... The most important of them is in my opinion the choice of the geometric projection. In PTGui there are many. You still have the classic cylindric, spherical or rectilinear ones, but so many more have been added... Into the Panorama Editor, it is also possible to improve the placement of images relatively to one another manually, especially when consecutive images lacked raw material to automatically place checkpoints. And finally, and that's a real asset of PTGui, it is possible to select the zones where pedestrians have moved for instance and could bring blurred zones or characters selected into the final panorama by eliminating them from pre-stitching, directly in pre-stitching. It is very efficient. Let's see this now...
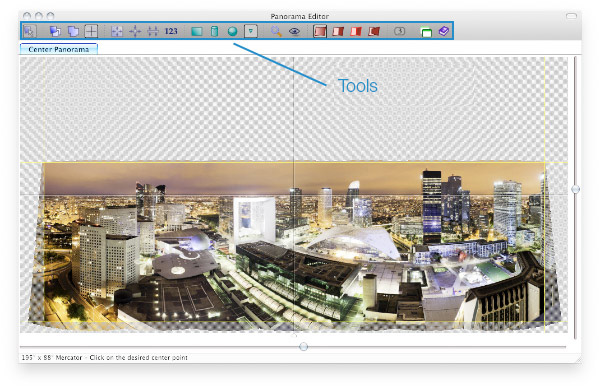
Panorama Editor toolbar
Numerous tools can be accessed via a set of icons that we'll see in details now.
There are seven different parts in the toolbar. Each part gathers common tools.
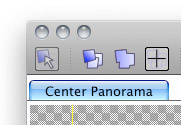
1 - Movement tools
When the second, third or fourth icon is selected, one click on the first enables to select a photo in the pre-stitched panorama, just below, in the workspace.
a) Second icon: enables to select one image in the panorama. For that, click the first icon in the toolbar then click on one photo of the panorama. You'll then be able to move it as you want.
b) Third icon: if you click this icon, you'll move the whole panorama at once. It's important to remark that this moving is then done on a virtual sphere. Try and see...
c) Fourth icon (cross-shaped): if you click this icon, you can then click anywhere in the panorama to center it on this new point. It becomes the new flight point of the panorama.
2 - Centering tool
In the second set of icons, you'll find tools enabling you to center the panorama or level it (automatically or not). Tip! For these icons to be accessible, it is important to choose a geometric projection under the form of an icon, just on the right of this serial of tools: "Rectilinear", Cylindric" or "Spherical". a - The first icon is used to enlarge the panorama in the width of the workspace. b - The second icon is used to center the panorama on the center of the workspace. It can give a studied effect. Try it... b - The fourth icon is used to straighten the panorama. It allows to keep the edges of the buildings straight, as if you'd used a shift lens when shooting. We saw in the generalities that it wasn't of any use. To get this result, we just had to tilt the body slightly during the shooting. d - And finally, the last icon, under the form of the figure 123, enables to move the panorama in Yaw, Pitch and Roll with numerical values. For specialists!
3 - Choice of geometric projection
It is possible to choose directly among the three main geometric projections: rectilinear (straight geometry, interesting for panoramas below 100-110°), cylindric projection (curve quite stretched in height) and spherical (curved but more compressed). I thus recommend you to read my page dedicated to geometric projections to see which influence your panorama has on the choice of this projection.
a - The rectangle thus stands for rectilinear projection also called straight or orthoscopic. All lines remain straight but the panorama is very distorted at the edges with a field of view above 100°. b - The cylinder stands for cylindric projection. All straight lines curve apart from the skyline. The edges of the image remain homothetic. For all the photos with a field of view over 100°. Caution: if the photo's been shot with a short focal, the image seems very stretched at the top and the bottom of the panorama. It doesn't always look so good. c - It is thus very simple once understood how the software gathers photos from a same panorama, which we'll see again later. d - The little arrow downward enables to select more geometric projections. It is particularly exhaustive.
4 - Zoom-in and preview
The two next tools enable to zoom in the panorama and view the pre-stitched panorama into the preview of your operating system. When zoom-in is activated, a new little window opens, slightly enlarged in the click zone, enabling to zoom at 100% and to work more accurately, especially during the edition of blending zones in stitching zones between two consecutive photos..
5 - Blending tools
As with best specialized pieces of panorama software, it is possible to check stitching zones before final stitching, especially if there's been moving objects in these zones that would leave ungracious ghost images in the final panorama. As such, PTGui enables a better control than its direct competitor thanks to layer masks.
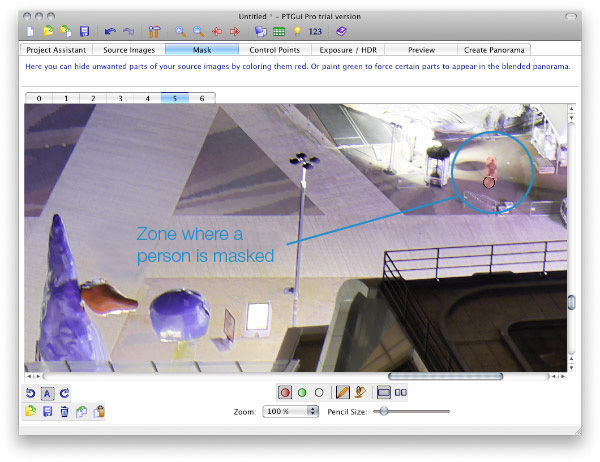
a - The first icon enables to show the panorama as it will be stitched and blended. By zooming in it, you can check that all stitching zones are correct. b - The second icon enables to show the panorama without blending hence use the details and luminosity harmonization blending tool. It's very educational but that's it! c - The third icon is the most important because it enables to edit these zones. To do so, click on it. You then see overlap zones and the numero of the photos in your panorama. Note that the icon with a figure on the right can be activated. It is thus possible to choose the photo to edit. Then activate zoom-in. The zoom-in window appears and you can move it from Panorama Editor to see the result of your edit in real time (big asset of PTGui). Then, go back to PTGui's main window (fig. below). Select the tab "Mask".
The character masked with the pencil tool (in red) will be eliminated from the final panorama. This operation is only possible in overlap zones, otherwise there would be a hole in your panorama.
In the tab that just opened, you'll use the "Pencil" tool (pencil or brush) selected by default (you paint the zones to eliminate red). It enables you to paint over the zone you don't want to see in your final panorama, a piece of passer-by, for instance, who would be partly in a photo and fully in the second photo. If you eliminate the first one (partial in this example) you'll only keep one full character in your panorama! There are many possible applications... Also remember to zoom-in at 100% into the mask window as in the figure above. d - Enables to show overlap zones without blending.
The last icons...
The last but one icon will enable you to position the Panorama Editor always before other windows and finally, the last icon enables to access online help.
Reframing in Panorama Editor
In order to render a panorama for which only active raw material is kept in the final panorama, PTGui's Panorama Editor offers a very convenient but well-hidden tool! Let's now see how to reframe...
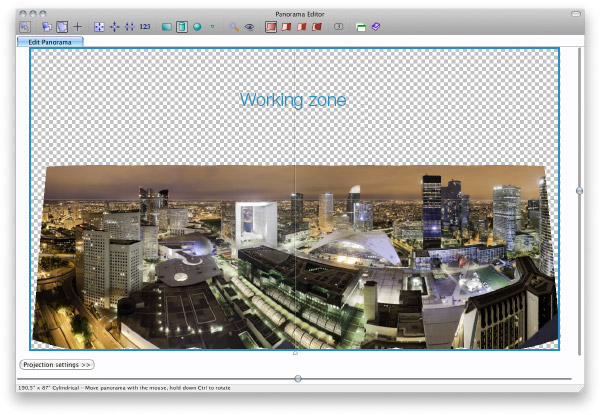
When the panorama's pre-stitched, it's shown into the display zone of the Panorama Editor as in the figure below:
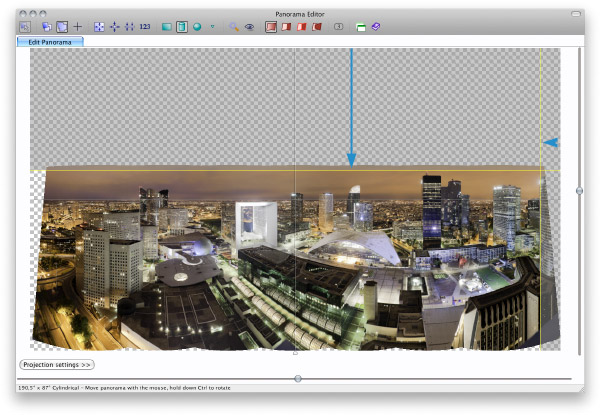
To reframe this panoramic photography in order to keep only the interesting part, you just have to draw a yellow reframing line on each side. For that, you need to place the mouse just at the edge of the workspace marked in blue below. The mouse then takes an usual aspect in this case, indicating that it can draw the zone to the right or the left. You only have to slide the yellow line into the panorama in order to eliminate the distorted zones, at the edges of the panorama.
When you'll launch the creation of the panorama, it will only keep the interesting zone otherwise, the final rendering would have the size of the workspace and would only make the created file heavier. There's no automatic reframing functionality in PTGui.
Temporary conclusion...
Before the closure of Kolor, which marked the end of Autopano, PTGui was its main competitor. With the last updates of 2019, PTGui has fixed the defects I found and I am definitely switching to this excellent assembly software.
As soon as I have time, I will complete this tutorial to make it as complete as possible but I hope it will make inexperienced amateurs want to try it because even with basic settings it works incredibly well....
Pratical Guide N°1 : The Nodal Point
$12.90 USD
My practical guides in e-books - N° 1!
"Find the nodal point or no parallax point accurately in less than an hour"... whether you are photographing a simple panorama or a 360° photo - PDF of 100 pages -More information...
This website is almost entirely free and yet almost free of ads. Why? Because they look so bad! It is lucrative though, and enables many websites to keep on living. So I asked myself: what can I do? To keep on developing this website, I'm going to need a regular income just like everyone else. How can I keep on giving access to free information like I've been doing since April 2002?
And I finally found the answer: affiliation. Every time you click on a link from this site to one of my partners' shops, they know you've been referred by me and give me a small percentage on your purchase, be it something I recommend on my website or anything else. Remember to use my links when you shop on these sites! It doesn't cost you anything and it's a win-win deal – for me, them, and you!


 When the second, third or fourth icon is selected, one click on the first enables to select a photo in the pre-stitched panorama, just below, in the workspace.
 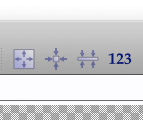 In the second set of icons, you'll find tools enabling you to center the panorama or level it (automatically or not). Tip! For these icons to be accessible, it is important to choose a geometric projection under the form of an icon, just on the right of this serial of tools: "Rectilinear", Cylindric" or "Spherical".
 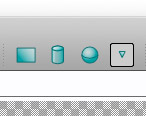 a
a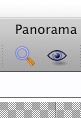 The two next tools enable to zoom in the panorama and view the pre-stitched panorama into the preview of your operating system. When zoom-in is activated, a new little window opens, slightly enlarged in the click zone, enabling to zoom at 100% and to work more accurately, especially during the edition of blending zones in stitching zones between two consecutive photos..
 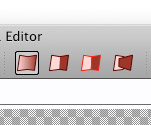 As with best specialized pieces of panorama software, it is possible to check stitching zones before final stitching, especially if there's been moving objects in these zones that would leave ungracious ghost images in the final panorama. As such, PTGui enables a better control than its direct competitor thanks to layer masks.