Even if it's entirely conceivable to shoot the photos with the camera hand-held, the stitching quality or more accurately its easiness will be greatly improved if you use a panoramic head.Let's see what it's about. Certain models, very well designed, now cost less than $200 / €200 and are very light and very easy to use. Then, I'll give you all my advice to best set up your camera...
Let's start by reviewing the settings of your camera that you need to control to improve your chances to make a panorama that will stitch correctly.
Then, we'll take a look at an accessory very often useful: a panoramic head.
But why then would we buy a special head called panoramic head? How does it work? How to do your best with your camera in hand?
How to take the photos to stitch?
Here are the most important point to remember to make your panoramic photographies by image stitching well. First of all, it's better to make certain settings on the camera...
Setting up the camera: my advices
If you want to make good panoramic photographies every time, it's very important to follow these first pieces of advice about the settings of your camera:
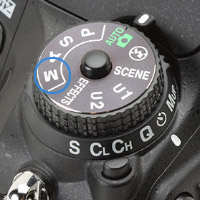
1 - If you can, set the exposure in manual mode (M) - You're the one deciding the exposure of your photo and above all it will be the same for all the photos so you won't have the problem afore mentioned.
Piece of advice! It's really better that all the photos have the same exposure, and if you set your camera in full automatic mode, there can be big luminosity differences that will be visible, above all in the sky.
2 - If you can, set the diaphragm around f8.0 / f11.0 - It increases the depth of field thus the really sharp focusing zone. Additionally, it allows to have less vignetting hence less darkening in the corners and at the edges of the photo and a sharpness at the edges of the photo. Very important!
Piece of advice! Certain cameras allow to automatically correct the vignetting of the photos if you're working in JPEG. Select this option.
3 - Focus with the autofocus THEN DEACTIVATE the autofocus - panorama software doesn't like photos taken with different focuses too much.
4 - Don't always choose the shortest focals but try 50 or 35 mm (or 24 mm in APS-C format) - Don't forget that the width of the panorama is given by the number of photos. You can stitch as many as you want... up to 360°! If a building is really high, don't hesitate to frame upwards and if it really doesn't fit, step back and if you can't, then yes, you may choose a short focal!!! I'm kidding of course, but really I don't like too short focals in panoramic photography.
You thus have to take photos that slightly overlap. The software will use this overlap zone to stitch the two photos together invisibly. The ideal overlap rate is about 30%.
Why is that? Why not more or less than 30%?
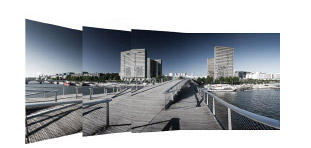
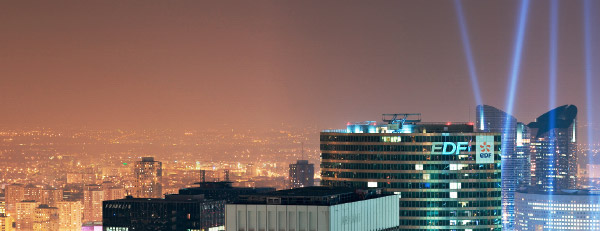
It's completely possible for a piece of software to stitch together photos that overlap less but if there are differences of exposure between two consecutive photos, it won't have much space to make luminosity and/or harmonious color corrections that won't be visible as in the example below, above all in the sky:
Piece of advice! The photos need to overlap about 30%. It's the ideal compromise. Below it's risky - though possible - if there's a problem of exposure and above, it forces to make "too many" photos but if you have to choose, if you're taking the photos with your camera hand-held, it's better to have more than less overlap.
Vertical or horizontal photos?
It doesn't matter! Direct the camera horizontally allows to shoot a wide panorama with less photos, that's all, and in return you won't always be able to photograph the top of a building or a church. Finally, your final file will be shorter in pixels.
Say you use a 24 megapixels body thus 6,000 x 4,000 pixels; if you're holding your camera horizontally (landscape mode), your final panorama will "only" be 4,000 pixels high while it would have been 6,000 pixels high held vertically (portrait mode). For a same panoramic field of view, you'll just have to take one, two or three more photos!
The rotation of the camera, essential point in panoramic photography!
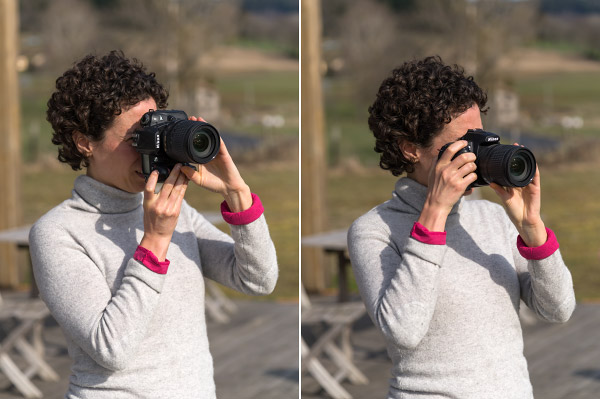
Naturally, anyone would turn with the camera around him as in the schema here on the left (A). But it turns out it introduces a big defect in the stitching of the images. Above all if you're shooting close and distant subjects at the same time in your panorama, your panoramas will be full of bad stitches as in the example below. That's the number 1 problem in panoramic photography by stitching.
When you shoot photos with your camera hand-held, the stitching are very often of a less good quality than with a panoramic head. The overlap zones look like the photo below, above all if you don't really pay attention to the way you're rotating your camera relatively to the ground.
However, there's a very easy way to free yourself from that problem...
In fact, the camera and its lens have to rotate around an "ideal" relatively to the ground that we call, most of the time, nodal point or entrance pupil (as in the schema above on the right (B). When the camera rotates around that famous point, the photos are most of the time perfectly stitched (because there can sometimes be another problem that materializes the same way.) Anyway, whether you shoot your photos with your camera hand-held or on a panoramic head that we're going to see now, it's really better that the camera rotate around this ideal rotation point.
Piece of advice! Even if panorama software has made huge progresses, it doesn't like these kinds of defects in the images. I thus "strongly" recommend to rotate around your camera, that must then give the impression not to move relatively to the ground rather than the contrary. Friendly advice! If you want to know everything about the nodal point, here's some reading
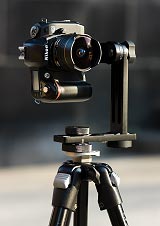
Use a panoramic head...
A panoramic head is thus a photo head but a little specific! In fact, it has two very convenient functionalities:
It allows to fix the camera on a tripod at the ideal rotation point: the nodal point.
It is notched on its rotary axis in order to turn your head exactly the number of degrees you need between two consecutive pictures. No need to look through the viewfinder anymore!
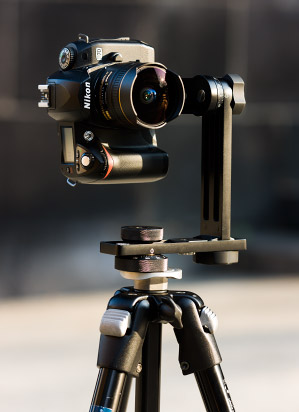
How? The two slides allow to position the camera "ideally" so that it rotates around that ideal point as you can see below:
In the photo over here, the center of the lens isn't above the rotary axis of the head and the photos won't be perfectly stitched because there's a gap of the subjects between the two photos. (See nodal point and entrance pupil). If you hover your mouse over the photo above, you'll see we've slid the camera to the left so that the center of the lens ends up the above the rotary axis of the lens. The setting is perfect and the stitchings will be very good. They can however be improved even more if you also make the in-depth setting as the illustration below:
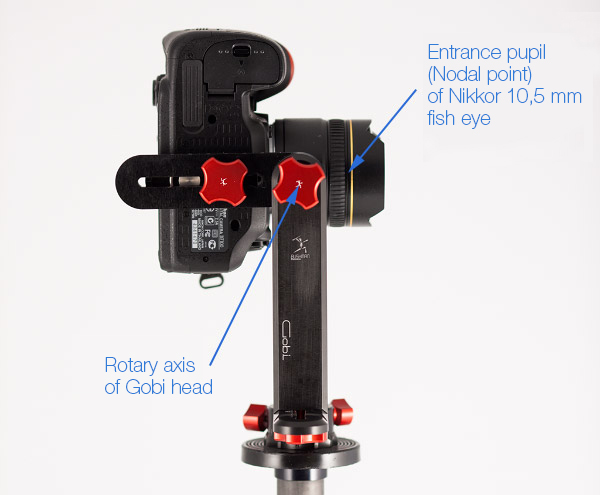
Problem: where is the nodal point (entrance pupil) for each lens? I describe it in details in the dedicated pages but here's my advice if you don't want to do it because it's too complicated if you're a beginner:
Piece of advice! Set your camera back so that the front of your lens (about 1 cm behind the front lens as shown above) ends up above the rotary axis. Even if it's not very accurate, it works well most of the time and it will still be a lot better than with your camera in hand!
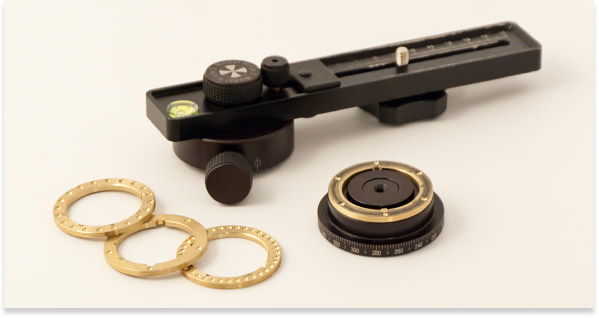
Then, the base of the head is most of the time notched. Each time you rotate your head, you feel a stop. Between two stops, you've turned your head of xx°. An example:
- If you're using a 28mm focal (equivalent to 24x36) thus a 17mm in APS format, you need to make 12 photos to make a whole turn at 360° WHILE keeping a 30% overlap zone between two photos. Very, very convenient! So you install the 12 holes clip above or you choose the Quick 12 clicks on the Gobi head.
Of course, the notches system changes depending on the panoramic head you'll choose. The head Nodal Ninja 3 allows to easily change the brass clip more or less pierced of holes (image above) and the Bushman Panoramic Gobi needs to change base to change notches. Less convenient but more reliable and anyway, we always use the same lens and the same focal!
So what panoramic head to choose?
I obviously recommend to models of panoramic heads that stand out to start well among all the existing models that I list on another page of my guide or that I review in details also in this guide for their value for money, their weight, their easiness of use. Here's my selection:
* Quick Click optional base: from 4 to 15 clicks. ** several rotators: basic (brass clips) or RD-16.
Stability
Height
Width
Weight Kg
Gobi
***
17 cm
12 cm
0.320
Nodal Ninja 3
*****
17 cm
15 cm
0.475
Bushman Panoramic Gobi
€237.00excl. VAT *
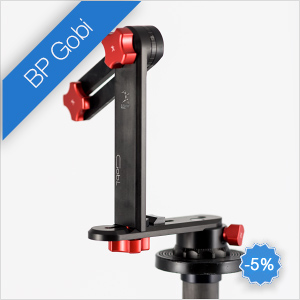
My opinion on Gobi panoramic head - Bushman Panoramic
This Gobi panoramic head from the company Bushman Panoramic possesses at first glance three obvious qualities: it's very well manufactured - materials and finishing -, it's very light since it only weighs 320 grs and it's super compact since it fits in the hand! It won't take much space in your photo bag or even in your pocket. It's not the stablest on the market but it doesn't have any importance considering its qualities... Finally allows to make virtual tours - Learn more
Caution: when you place your order, carefully choose the number of clicks on your base. 15 clicks for a 35mm; 12 clicks for a 28mm; 10 clicks for a 24 mm and 8 clicks for a 16-17 mm.
* 5% discount on Gobi head at Bushman-panoramic.com
Nodal Ninja 3 Mark III
€202.08 *
My opinion on Nodal Ninja 3 MkIII
The head Nodal Ninja3 is a very versatile head since it also allows to realize virtual tours. It's more stable than the Gobi but also noticeably heavier and above all, bulky, even if it remains acceptable, only the Gobi sets the level pretty high on those two criteria. You see what's more important to you...
There are several optional notched rotators RD-8, RD-16 around $150. They allow to change easily the number of notches between two photos. It's very convenient but quite expensive and heavy.
You now have everything you need to make beautiful panoramas that stitch a lot more easily than with a hand-held camera! You still have to stitch your photos and that's what we'll see in the next page - What panorama software to choose? free or not? - Software to Stitch a panorama
If you want to learn more, read my detailed guide ...
"Find the nodal point or no parallax point accurately in less than an hour"... whether you are photographing a simple panorama or a 360° photo - PDF of 100 pages -More information...
This website is almost entirely free and yet almost free of ads. Why? Because they look so bad! It is lucrative though, and enables many websites to keep on living. So I asked myself: what can I do? To keep on developing this website, I'm going to need a regular income just like everyone else. How can I keep on giving access to free information like I've been doing since April 2002?
And I finally found the answer: affiliation. Every time you click on a link from this site to one of my partners' shops, they know you've been referred by me and give me a small percentage on your purchase, be it something I recommend on my website or anything else. Remember to use my links when you shop on these sites! It doesn't cost you anything and it's a win-win deal – for me, them, and you!


 1
1 Piece of advice!
 4
4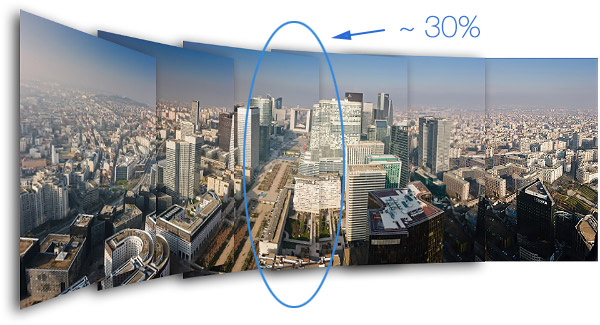
 Naturally, anyone would turn with the camera around him as in the schema here on the left (A). But it turns out it introduces a big defect in the stitching of the images. Above all if you're shooting close and distant subjects at the same time in your panorama, your panoramas will be full of bad stitches as in the example below.
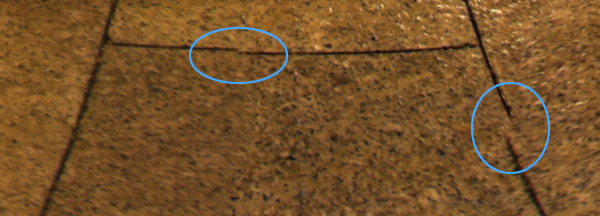
 A panoramic head is thus a photo head but a little specific! In fact, it has two very convenient functionalities:
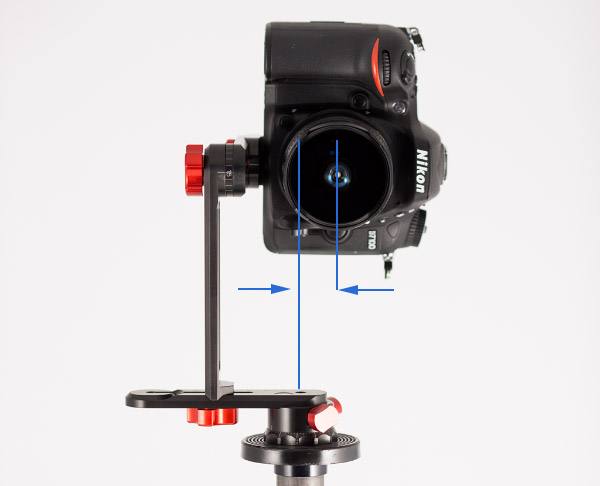

 Caution:
 * 5% discount on Gobi head at Bushman-panoramic.com
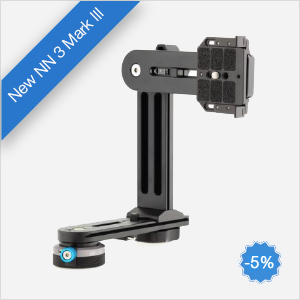
 If you want to learn more, read my detailed guide ...


