In this page, you'll find some settings and functionalities that allow to optimize the functioning and the use of Autopano Giga / Pro. They would have added too much length to previous pages, already long enough...
It's about setting some preferences of the panorama editor or managing the history or even saving a .pano project...
Open/Save an Autopano Giga/Pro project
When you're working on a stitching, it's good to save everything you're doing in a .pano file, which is a project file. This file saves the images of a group, their place on the hard drive - so you shouldn't change the path later if you don't want the .pano to ask you where the said photos are - and their place in the pre-stitched panorama in the panoramas column. Then, this file will save everything you're doing on this panorama. It's very handy to go back to a panorama a moment later without having to start all over again, even without launching Final rendering. Besides, it's also very convenient when you want to make batch processings. To do so, there are several solutions.
Watch this video tutorial
(This tutorial has been made with Autopano version 2.5)
(Contribute to the development of this site by buying this DVD from the link above.)
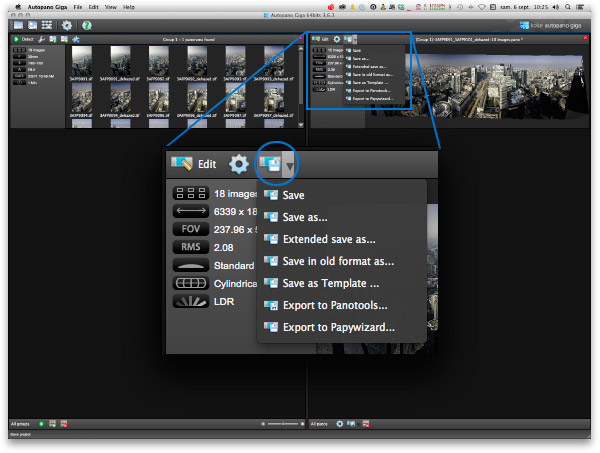
Save a project from the main window
First solution - from the main window : When you're in the main window, the Save as... menu can't be accessed via the classic File / Save as... menu. You need to go to the panorama menu bar, in the right column, the one for panoramas and click the "floppy disk". If it's the first time you're clicking this icon, the software will open the explorer to ask you what you want to save (a project, a template, etc,) and name it, of course. If you click the little black arrow to its side, it will unfold the menu above. If the project is already saved, no menu appears when you click the icon. What you did was quite simply saved, the equivalent of CMD+S / CRTL+S. To Save as..., you absolutely need to click the black arrow and open the unfolding menu.
Piece of advice! I recommend to save your project regularly and that, directly in your Images folder. This way, in your file My-project-06-2011 where all the photos to stitch together are, you'll also find a file My-project-06-2011.pano. It will be very easy to find.
Second solution - from the panorama editor:When you open the panorama editor by clicking the "Edit" button over there, you open a new window. If you then go to the classic File / ... menu, you'll find the as classic "Save", "Save as...", etc. They work exactly how described above. And you'll find the "Save the project as..." icon in the menu bar of the panorama editor.
Panoramas column
Panoramas menu bar
The button Edit a panorama is a shortcut allowing to launch the panorama editor and to make numerous optimizations before launching the final rendering.
The button Render a panorama is a shortcut enabling to launch the final rendering of this panorama without editing it. It requires self-confidence!
The button Save a .pano project allows to keep the images of the panorama as well as their pre-stitched positions in memory.
Panorama footer
The button Render from the menu bar in the footer of the panorama column allows to launch the final rendering of all pre-stitched panoramas in the panoramas column.
The button Save all projects enables to save all panorama projects at the same time. Very convenient!
The button Shut all panoramas allows to shut all panoramas in the panoramas column in one click.
Save a project from the panorama editor
Save a project from the editor
The button Save a .pano project enables to keep the images of the panorama in memory as well as their pre-stitched positions.
Panorama footer
The button Render of the menu bar in the footer of the panorama column enables to launch the final rendering of all pre-stitched panoramas in the panoramas column.
The button Save all projects enables to save all panorama projects at the same time. Very convenient!
The button Shut all panoramas allows to shut all pre-stitched panoramas in the panoramas column in one click.
Open a .pano project
You just need to go to the File / Open one or several Autopano files menu from the main window of Autopano Giga or Pro only.
Render a batch of panoramas
From the batch processing window, it's possible to launch a batch processing of .pano files, and even all .pano files in a same folder gathering them.
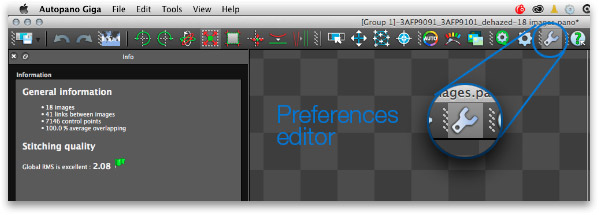
Preferences of the panorama editor
Different from the general preferences of the software, the editor preferences enable to set several important work or display parameters.
This window can be accessed via the classic File / Preferences menu (and thus opens a different window from the software preferences window that opens via the same path but only when you're in the main window of the software) or through the dedicated icon in the menu bar of the panorama editor:
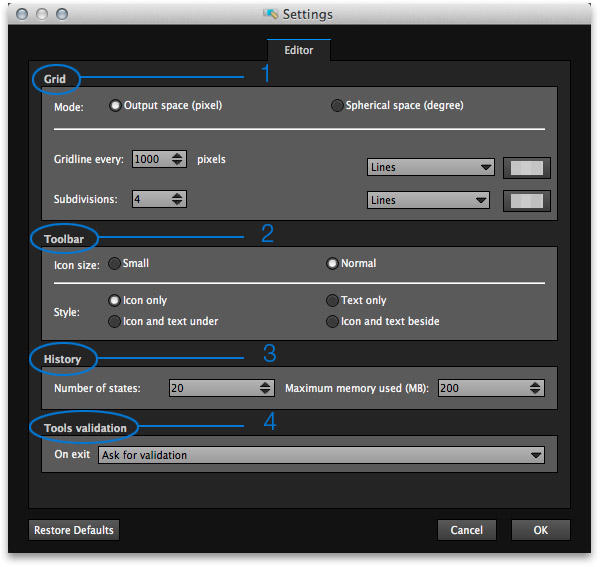
Grid (1) - The most interesting option is the possibility to display a shaded grid and not a pixel one. It's very convenient to know the field of view of the photo. The display of the grid in itself is also customizable.
Toolbar (2) - The display of the toolbar can be customized.
History (3) - As in Photoshop, it is now possible to parameter the history in Autopano Giga. Not only can you choose the number of steps saved in the history but also the amount of dedicated memory. Your call!
Tools validation (4) - It is now possible to keep the tools activated as before shutting when reopening Autopano.
Tools and functionalities are gathered in four distinct parts. Each part can be separated and placed on another screen. It is even possible now to save your workspace as in Photoshop but it involves leaving the panorama editor: File / Save workspace. Instead of reviewing each tool right away, we're going to edit this panorama and use all the tools progressively. But before, let's just see quickly the history tool.
(Contribute to the development of this site by buying this DVD from the link above.)
The history can now be set in the preferences of the panorama editor - number of steps saved especially -. You can either use the arrows in the menu bar, either open the history palette to the left of the panorama's edition zone. It's just a tab hidden by the "Info" tab.
The history in Autopano Giga
Undo / Redo buttons are new here and quite handy. It's not necessary anymore to open the history palette. You can undo 20 steps by default but this figure can be modified.
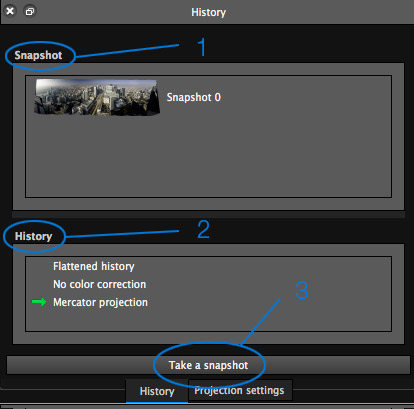
When you click the tab "History" of the history palette, in the right column, you open the window below.
This history palette can be separated and moved.
Capture (1) - Each time you want to save an important step of your work, you can take a capture with button 3, at the bottom of the palette. Each capture is added below capture 0. If you click the capture photo, you directly go back to this step. History (2) - Each time you make the least operation on your panorama, it's saved here. To go back to one step, you just have to click its name. Create a capture (3) - to make a capture.
This appendix will be filled out later...
Pratical Guide N°1 : The Nodal Point
$12.90 USD
My practical guides in e-books - N° 1!
"Find the nodal point or no parallax point accurately in less than an hour"... whether you are photographing a simple panorama or a 360° photo - PDF of 100 pages -More information...
This website is almost entirely free and yet almost free of ads. Why? Because they look so bad! It is lucrative though, and enables many websites to keep on living. So I asked myself: what can I do? To keep on developing this website, I'm going to need a regular income just like everyone else. How can I keep on giving access to free information like I've been doing since April 2002?
And I finally found the answer: affiliation. Every time you click on a link from this site to one of my partners' shops, they know you've been referred by me and give me a small percentage on your purchase, be it something I recommend on my website or anything else. Remember to use my links when you shop on these sites! It doesn't cost you anything and it's a win-win deal – for me, them, and you!


 Piece of advice!
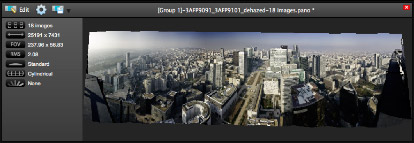
 The
The  The
The  The
The  The
The  The
The