When you buy Autopano's Giga version, you have the possibility to install plugins which enable you to make the selection of the images you'll then be stitching directly in Autopano. Here's how...
As all professional photographers and many amateurs, I use Photoshop or Lightroom. Personally, I have a preference for Photoshop hence Bridge, Adobe's file explorer, but whatever. Since I only work in RAW format, I have to use Camera Raw or the "Development" tab in Lightroom to develop my files. It is then very easy to select the images you're going to stitch together from these two programs and to open them directly in Autopano Giga.
Installation of the Bridge and/or Lightroom plugins
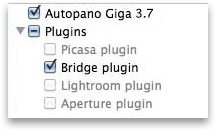
First, you need to make sure that you installed the plugins when you installed Autopano Giga.
Important note! If you wish to use Autopano Giga's plugins Bridge and Lightroom, it is essential that this or these program(s) are previously installed on your computer in order to be identified by Autopano's installer which will offer you to install the plugins during its installation (see the photo here).
When you reach the step "Installation type", the program will ask you if you want to install Autopano (!!!) and, of course, the plugins: Picasa, Bridge, Lightroom and Aperture. Be sure to check the plugins you want. It will install a quick access menu in these programs as we will now see here below.
Select and open images in Autopano from Photoshop's Bridge
You have two possibilities to automatically send selected images in Bridge in order to stitch them into a nice panorama using Autopano Giga:
Using Autopano Giga's "Tools menu > Assemble..."
1 - Select all the photos you want to assemble in Bridge (at least two).
2 - Click on the menu "Tools > in Autopano Giga > Assemble..."
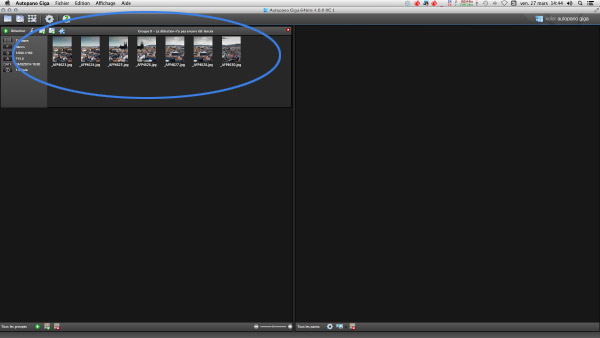
It opens Autopano Giga automatically and creates a new group in the groups column, on the left.
Through the contextual menu (right click) "Assemble..."
It is also possible to select all the photos you want to stitch in a same panorama using Bridge (in this case, you need to select the thumbnails) then right-click to open a contextual menu. Then you just have to click on the last: "Autopano Giga 4.4 > Assemble..." :
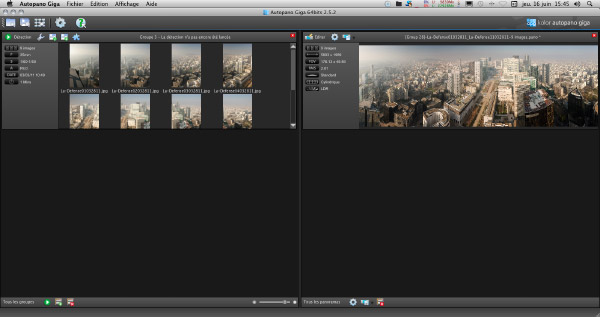
Autopano opens directly with a new group of images in the left column as below:
The column of the images groups to be stitched is on the left.
Select and open images in Autopano from Lightroom
Lightroom doesn't work the same way as Bridge since you're going to have to export the photos towards Autopano. I won't need to explain you that you need to have previously created a catalogue in order to have access to your images to be able to open the "Export..." menu!
You need to export all the images that belong to the same panorama
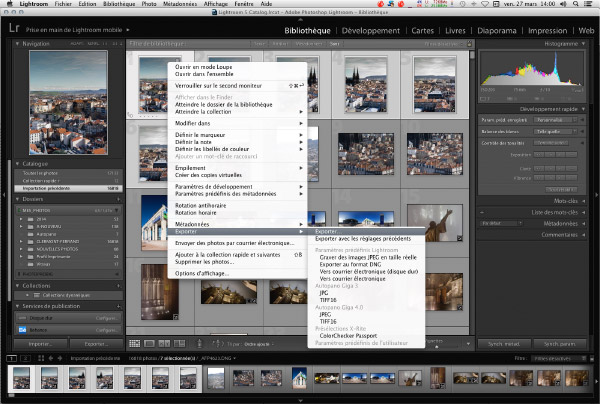
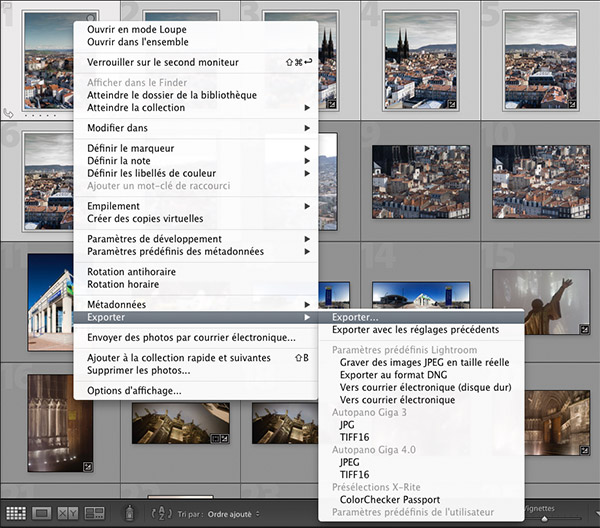
1 - In Lightroom's "Development" tab, you need to select all the images that will be stitched into one panorama.
2 - Then right-click to open the contextual menu: "Export > Export..."
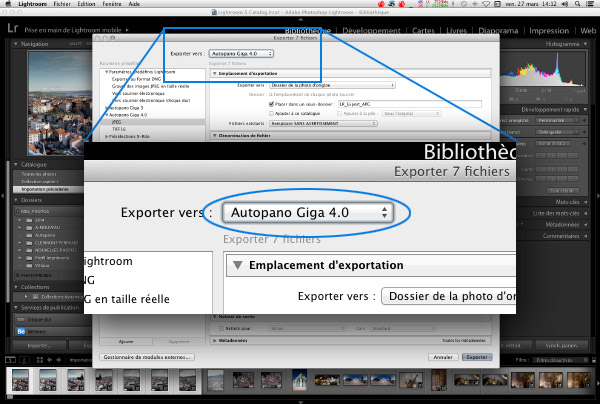
A new export window opens:
You just need to choose the export options then, and in particular:
The export destination - Lightroom offers you to place the export files in a subfolder, named by default "LR-Export-APG", which I recommend you to do.
Files settings - Here, you're going to choose the files' format: JPEG or TIFF 16 bits and the color management options. By default, the color space is sRGB and I recommend you to keep it that way if you're not comfortable with color management. I give you all the information about these choices in my color management guide but in particular in the page "sRGB, Adobe RGB or ProPhoto, what's best?"
My recommendation! If you're going to opt for the JPEG format, I recommend you to choose 100% for the compression rate which, in terms of quality of the details, is just like TIFF as I demonstrated it in one of my blog posts. The only difference will lie in certain gradients viewed at 200% in Photoshop... not that often then. It is not necessary to "overchoose" TIFF rather than JPEG, especially in 100% quality!
And then you just need to click the "Export" button at the bottom right of the window. After kindly working on its own, (you can see the progression of the export at the top left in Lightroom) Lightroom is going to send these images directly into Autopano Giga. Wonderful! !!
"Find the nodal point or no parallax point accurately in less than an hour"... whether you are photographing a simple panorama or a 360° photo - PDF of 100 pages -More information...
This website is almost entirely free and yet almost free of ads. Why? Because they look so bad! It is lucrative though, and enables many websites to keep on living. So I asked myself: what can I do? To keep on developing this website, I'm going to need a regular income just like everyone else. How can I keep on giving access to free information like I've been doing since April 2002?
And I finally found the answer: affiliation. Every time you click on a link from this site to one of my partners' shops, they know you've been referred by me and give me a small percentage on your purchase, be it something I recommend on my website or anything else. Remember to use my links when you shop on these sites! It doesn't cost you anything and it's a win-win deal – for me, them, and you!


 Important note!
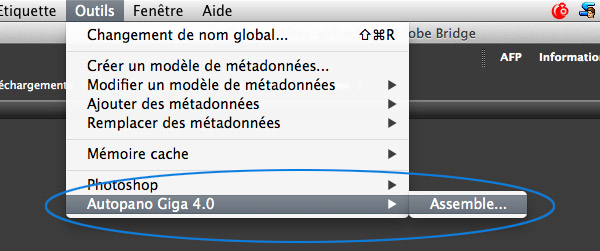

 My recommendation!
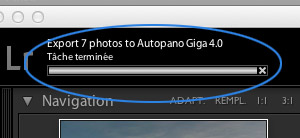 And then you just need to click the "